Overlay
For eye candy
For presentations
For interactions
For every overlaying need
You'll need different kinds of overlays for different situations such as eye candy for displaying your products, snappy overlays for info or warning boxes, modal dialogs for prompting and alerting users or tabbed overlays for displaying complex data.
All these are possible with the Overlay effect framework.
Configure the looks and behaviour
The overlay can contain any HTML such as images, links, forms and tables and everything can be styled with CSS; be it rounded borders, shadows or gradients.
Core behaviours are configurable such as positioning, animation durations and the ways of closing the overlay.
Plays nice with other Tools
Overlay offers a good container for other tools. Think of scrollables, tabs or accordions inside the Overlay. There are many fancy user interfaces to be explored.
File size: 0.93 Kb
This tool has all the features and configuration options you'll possibly need, such as effect and a plugin framework, scripting API and an event model. A smaller codebase is easier to control and results in snappier behaviour. Without gzipping the size is 2.87 Kb.
Usage
The general way to setup overlay is as follows:
  // select one or more elements to be overlay triggers
  $(".my_overlay_trigger").overlay({

  // one configuration property
  color: '#ccc',

  // another property
  top: 50

  // ... the rest of the configuration properties
  });
When you click on one of the triggers it will open an overlay that is being specified by the trigger's rel attribute. Look at the minimal setup to get started quickly.
Demos
You can study the workings of overlay in the following examples. Each contains documented source code, along with a standalone page to allow you to easily transfer the examples to your own site. The most important example is the first one, "Minimal setup for overlay".
- Minimal setup for overlay
- The apple effect for overlay
- Creating modal dialogs with overlay
- Opening overlays programmatically
- Overlays with different styles
- Loading external pages into overlay
- Multiple overlays on the same page
- Creating a customized overlay effect
Combining overlay with Flowplayer
These demos provide some examples of how to use overlay and Flowplayer together.
- The basics of overlaying videos
- Custom fullscreen action in overlays
- E-mail and embed features in overlays
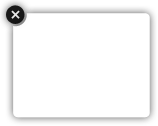
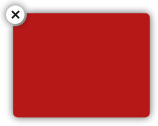
overlay Graphics

You can use our graphics as the basis for your design. You can freely change the design as you see fit. Click the image on the right to download a zip file. Before using the graphics, you should consult the User's Guide on how graphics can be used when designing the look and feel of the tools.
Here are a few examples of what is included in the zip file:

Configuration
Here is a list of all available configuration options:
| Property | Default value | Description |
|---|---|---|
| close | |
A jQuery selector for the closing elements inside the overlay. These can be any elements such as links, buttons or images. If this is not supplied, a close element is auto-generated. Read more about this in defining close actions. |
| closeOnClick | true |
By default, overlays are closed when the mouse is clicked outside the overlay area. Setting this property to false suppresses this behaviour which is suitable for modal dialogs. |
| closeOnEsc | true |
By default, overlays are closed when the ESC keyboard key is pressed. Setting this property to false suppresses this behaviour. |
| effect | 'default' |
The effect to be used when an overlay is opened and closed. This can dramatically change the behaviour of the overlay. By default this tool uses an effect called "default" which is a simple show/hide effect. Here is a list of currently available effects and you can also make your own effects. |
| fixed | true |
since 1.2.0. whether overlay stays in the same position while the screen is scrolled. This is the default behaviour for all browsers except IE6 and below. IE6 does not support fixed positioning. If this property is set to false then the overlay is positioned in relationship to the document so that when the screen is scrolled then the overlay moves along with the document. |
| mask | |
Previously known as expose. Overlay is very
often used together with
the Mask Tool. Because
of this, the support for this feature has been built inside the
tool. This option accepts
the mask
configuration. This is either a simple string specifying the
background color of the mask or a more complex object literal
specifying more configuration variables.
See an example of an overlay together with mask. By default masking is disabled. |
| left | "center" | Specifies how far from the left-hand edge of the screen the overlay should be placed. By default the overlay is horizontally centered with the value "center" but you can also supply a numerical value specifying a distance in pixels. |
| load | false | since 1.2.0. If enabled then the overlay loads immediately after it has been initialized. |
| oneInstance | true |
By default, there can be only one overlay on the page at once. Setting this property to false allows you to have multiple overlay instances. |
| speed | 'normal' |
The speed of the fade-in animation on the "default" effect. Valid values are 'slow', 'normal' and 'fast', or you can supply a numerical value (in milliseconds). By setting this property to 0, the overlay will appear immediately without any animation. |
| target | |
The element to be overlayed (if not specified in the rel attribute of the triggering element). |
| top | '10%' | Specifies how far from the top edge of the screen the overlay should be placed. Acceptable values are an integer number specifying a distance in pixels, a string (such as '15%') specifying a percentage value or "center" in which case the overlay is vertically centered. Percentage values work consistently at different screen resolutions. |
Events
Make sure you have read about Events in jQuery Tools. All event listeners receive the Event Object as the first argument and there are no other arguments for Overlay.
| event | When it occurs? |
|---|---|
| onBeforeLoad | before the overlay is displayed. The overlay has already been positioned at the location from where it will start animating. |
| onLoad | when the overlay has completely been displayed |
| onBeforeClose | before the overlay is closed |
| onClose | when the overlay is closed |
Scripting API
First make sure you have familiarized yourself with jQuery Tools scripting. Here is a list of all available API methods:
| Method | Return value type | Description |
|---|---|---|
| close() | Overlay |
Closes the overlay. |
| getClosers() | jQuery |
Returns the closing element(s) as a jQuery object. |
| getConf() | Object |
Returns the configuration for the overlay. |
| getOverlay() | jQuery |
Returns the overlayed element as a jQuery object. |
| getTrigger() | jQuery |
Returns the triggering element as a jQuery object. |
| isOpened() | boolean |
Returns true if the overlay is opened. |
| load() | Overlay |
Opens the overlay. |
Defining custom close elements
By default, a close button is auto-generated as the first element inside the container. Here is the generated HTML:
  <!-- auto- generated close button -->
  <div class="close"></div>
You can easily add more closing elements inside the overlay simply by assigning the CSS class name "close" to them. These elements can be styled and positioned any way you like inside the overlay.
If you supply a value for the close configuration variable, the close element is not auto-generated and you need to define the closing element(s) yourself.
Making custom effects
If you want to make custom effects you should use the $.tools.overlay.addEffect method. This method is "static", meaning that you don't have to have the overlay API (or instance) already loaded. You can add effects before any overlays are initialized.
This method accepts three arguments. The first argument is the effect name, the second argument is the function that performs the required functionality for loading the overlay and the third argument is a function that closes the overlay. You can use this method to modify existing effects or add new ones. Here is the official default effect taken directly from the source code of the overlay tool:
  // adds an effect called "myEffect" to the overlay
  $.tools.overlay.addEffect("myEffect", function(position, done) {

  /*
  - 'this' variable is a reference to the overlay API
  - here we use jQuery's fadeIn() method to perform the effect
  */
  this.getOverlay().css(position).fadeIn(this.getConf().speed, done);
  },

  // close function
  function(done) {

  // fade out the overlay
  this.getOverlay().fadeOut(this.getConf().closeSpeed, done);
  }
  );
As you can see it is fairly easy to implement effects. Inside the functions the this variable is a pointer to the scripting API. This gives you access to various parts of the overlay elements.
The loading function receives two arguments. The first argument position defines the top and left properties given in the configuration. The second argument is a callback function that must be called after you have performed your loading effect.
The done callback received as an argument must be called after you have performed you effect. The reason for this is that many times those effects perform animations that have a certain duration. We must know when these animations are finished so that the onLoad and onHide events are really called after the overlay is completely shown or hidden.
Note: if you are using jQuery's animate, fadeIn or fadeOut methods the done function can simply be given to this method as the last argument. jQuery will take care of it after the animation finishes. Otherwise you must call done.call().
Here is one custom overlay effect demo.